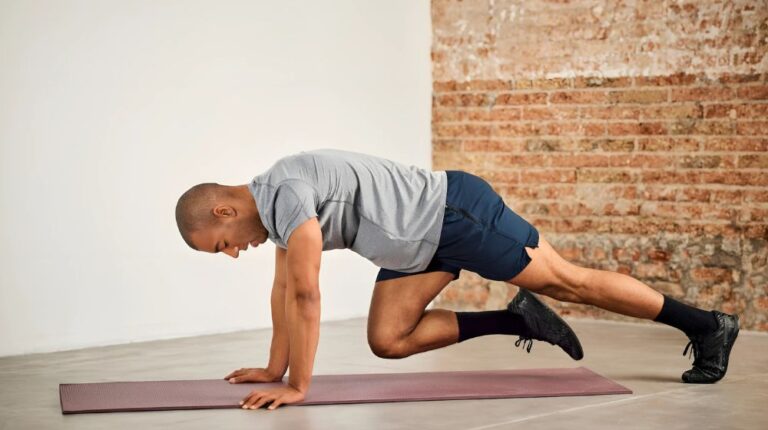
Yoga for flexibility enhances range of motion, reduces tension, and promotes overall wellness through gentle stretching and mindful movement.
Introduction
Yoga is a practice that has been cherished for thousands of years for its ability to improve not just physical flexibility, but also mental clarity and emotional balance. Whether you’re a seasoned practitioner or new to yoga, incorporating specific poses into your routine can enhance your flexibility and overall well-being. Flexibility isn’t just about being able to touch your toes—it’s about releasing tension, improving mobility, and preventing injury in the long run.
Incorporating yoga into your daily life helps lengthen muscles, improve joint mobility, and increase your body’s range of motion. This, in turn, can lead to better posture, less pain, and enhanced athletic performance. Whether you’re aiming to loosen tight hips, stretch your spine, or open up your shoulders, yoga offers a wide range of poses that can target all areas of the body.
The Importance of Yoga and Flexibility {1}
Improved Physical Health
Increased Range of Motion
One of the most immediate and visible benefits of yoga is improved flexibility. Yoga targets muscles and joints by lengthening and stretching them, which increases your range of motion. This contributes to overall body efficiency, better mobility, and reduced discomfort.
Muscle Relaxation and Tension Relief
Yoga helps release tight muscles, particularly in areas like the back, hips, and shoulders, which are prone to tension. This release not only alleviates pain but also promotes a sense of relaxation, helping you feel more comfortable throughout the day.
Prevention of Injury
Flexibility and Injury Prevention
Flexible muscles and joints are less prone to injury. Through yoga, the body becomes more adaptable to movement, allowing for a better ability to absorb shocks and prevent strains. A well-rounded yoga practice strengthens muscles while improving flexibility, helping to protect the body from injury.
Awareness of Body Limits
Yoga encourages mindfulness and body awareness, helping practitioners recognize their limits and avoid pushing too hard. This awareness lowers the risk of overextension and encourages safe practice.
Better Posture and Alignment
Improved Posture through Flexibility
Flexibility is crucial for better posture. Regular yoga practice helps stretch and strengthen muscles that support your spine and shoulders, leading to more balanced and aligned posture. As flexibility improves, you are more likely to maintain an upright, healthy posture.
Alignment for Joint Health
Proper alignment through yoga not only helps with posture but also reduces strain on joints and muscles. This supports joint health and prevents discomfort caused by misalignment.
Enhanced Mental Well-being
Stress Relief and Emotional Balance
Yoga’s emphasis on deep breathing and mindful movement helps reduce stress, creating emotional balance. The practice encourages relaxation, which can lead to reduced anxiety and improved mood.
Emotional Release
As the body becomes more flexible, it can help release emotional tension stored in the muscles, promoting an overall sense of well-being. The physical release of tightness often corresponds with emotional release, leading to a clearer mind and a lighter spirit.
Increased Range of Motion
Everyday Movement Efficiency
Flexibility directly impacts your ability to perform daily activities with ease. Whether it’s bending down to tie your shoes or reaching overhead to grab something, increased flexibility allows for more fluid, effortless movement.
Enhanced Athletic Performance
Flexibility is a key factor in sports performance. Yoga helps increase flexibility, which in turn can improve agility, endurance, and overall athleticism, giving athletes an edge in performance while reducing the risk of injury.
Promotes Relaxation and Stress Relief
Calming Effects of Yoga
Yoga encourages deep, mindful breathing that helps activate the parasympathetic nervous system, the body’s “rest and digest” response. This promotes relaxation, reduces stress, and improves sleep quality, leading to a calmer, more balanced life.
Releasing Tension through Movement
Holding yoga poses while breathing deeply encourages the release of tension in the muscles, helping the body and mind to relax. The process not only stretches muscles but also promotes a state of tranquility and peace.
10 Poses to Add to Your Routine for Flexibility
Downward-Facing Dog
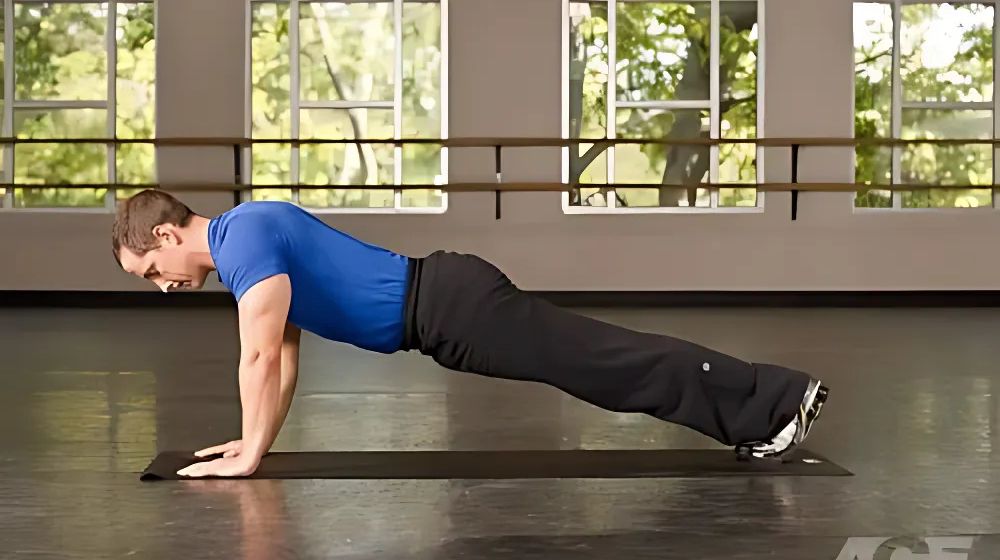
Downward-Facing Dog (Adho Mukha Svanasana) is one of the most well-known and foundational poses in yoga. Its name comes from Sanskrit: “Adho” means downward, “Mukha” means face, and “Svanasana” translates to dog pose, as it resembles a stretching dog.
This pose is often practiced in various styles of yoga, including Hatha, Vinyasa, and Ashtanga, and is a key part of sequences like Sun Salutations. It serves as a transitional, resting, and strengthening pose that offers both physical and mental benefits.
How to Do Downward-Facing Dog (Adho Mukha Svanasana):
Start in Tabletop Position:
- Begin on your hands and knees on the mat.
- Place your wrists directly under your shoulders and your knees under your hips.
- Spread your fingers wide for a stable base, pressing your palms evenly into the mat.
Tuck Your Toes:
- Curl your toes under so the balls of your feet press into the floor.
Lift Your Hips Up and Back:
- On an exhale, lift your knees off the mat.
- Straighten your legs as much as you can without locking your knees.
- Push your hips up toward the ceiling, creating an inverted “V” shape with your body.
Adjust Your Hands and Feet:
- Keep your hands shoulder-width apart and feet hip-width apart.
- Press firmly into your hands, especially through the index finger and thumb, to avoid putting too much pressure on your wrists.
Lengthen Your Spine:
- Focus on elongating your spine.
- Keep your head between your arms, with your ears in line with your biceps.
- Relax your neck and gaze softly toward your feet or the back of the mat.
Press Heels Toward the Floor:
- Engage your legs and aim to press your heels toward the mat (they do not need to touch the floor).
- If your hamstrings feel tight, you can keep a slight bend in your knees.
Hold and Breathe:
- Stay in the pose for 3–5 deep breaths or longer if comfortable.
- Focus on steady inhales and exhales while maintaining the length and strength of the posture.
Release:
- To come out of the pose, lower your knees gently back to the mat and return to the tabletop position or rest in Child’s Pose.
Alignment Tips:
- Keep your shoulders away from your ears.
- Draw your belly in to support your lower back.
- Avoid rounding your spine—focus on creating length.
- Ensure your weight is evenly distributed between hands and feet.
Benefits of Downward-Facing Dog (Adho Mukha Svanasana):
Stretches the Entire Body:
- Lengthens the spine, hamstrings, calves, and shoulders.
- Opens up the back of the legs and releases tightness.
Strengthens Muscles:
- Builds strength in the arms, shoulders, wrists, and legs.
- Engages the core muscles, improving stability.
Improves Posture and Alignment:
- Encourages spinal alignment by lengthening and decompressing the spine.
- Helps counteract the effects of sitting and slouching.
Increases Blood Circulation:
- As an inversion, it allows fresh blood flow to the brain and upper body.
- Energizes the body and improves oxygen circulation.
Calms the Mind and Reduces Stress:
- The pose encourages deep breathing, helping to calm the nervous system.
- Reduces feelings of anxiety and fatigue.
Relieves Tension and Pain:
- Eases back pain by stretching and elongating the spine.
- Reduces stiffness in the shoulders, neck, and legs.
Improves Flexibility:
- Regular practice increases flexibility in the hips, hamstrings, and shoulders.
- Helps improve range of motion over time.
Forward Fold
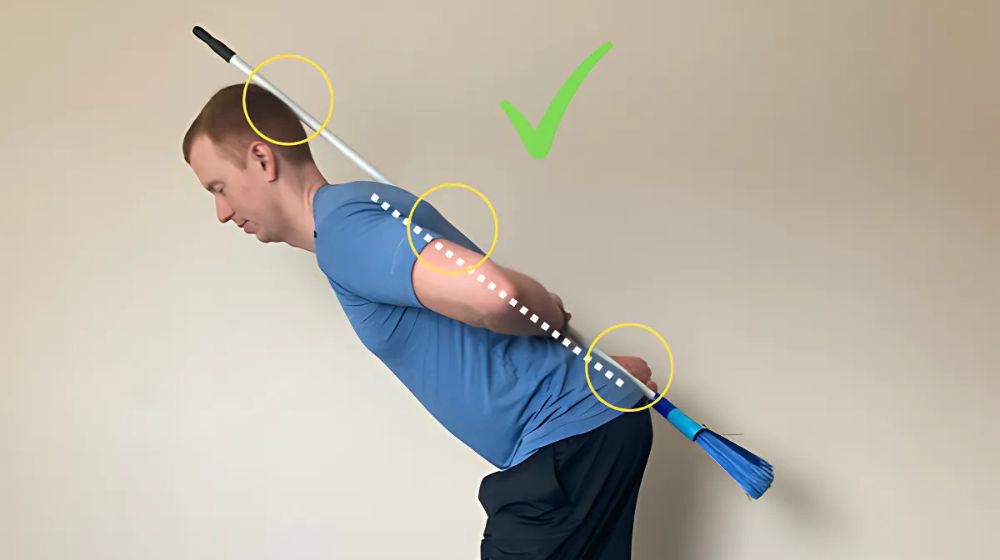
Forward Fold, or Uttanasana in Sanskrit, is a foundational yoga pose that combines strength, flexibility, and relaxation. The name derives from the Sanskrit words “Ut” (intense), “Tan” (stretch), and “Asana” (pose). It is a standing forward bend that deeply stretches the back body while promoting calmness and introspection.
This pose is widely practiced in various yoga styles, including Hatha, Vinyasa, and Ashtanga, and is often incorporated into sequences like Sun Salutations. Forward Fold helps release tension in the spine, hamstrings, and calves while quieting the mind. It also encourages a sense of surrender, making it both physically therapeutic and mentally soothing.
How to Do Forward Fold (Uttanasana):
Start in Mountain Pose (Tadasana):
- Stand tall with your feet together or hip-width apart, grounding evenly through all four corners of your feet.
- Engage your thighs and lengthen your spine.
Inhale and Lengthen Your Spine:
- Lift your arms overhead, reaching through your fingertips to create space in the torso.
- Draw your shoulders away from your ears.
Exhale and Hinge at the Hips:
- Begin to fold forward by hinging at your hips, not the waist.
- Keep your back straight as you fold, aiming to lengthen the spine rather than rounding it.
Relax Your Hands and Neck:
- Allow your hands to rest on the floor, your shins, ankles, or hold onto opposite elbows (Rag Doll variation).
- Let your head hang heavy and release any tension in your neck.
Engage Your Legs:
- If your hamstrings feel tight, bend your knees slightly to maintain a gentle stretch without straining.
- Keep the thighs active by gently lifting the kneecaps and pressing your feet into the ground.
Hold the Pose and Breathe:
- Stay in the pose for 3–5 deep breaths, or longer if comfortable.
- With each inhale, lengthen your spine, and with each exhale, fold a little deeper, relaxing further into the stretch.
To Release the Pose:
- Bend your knees slightly, engage your core, and inhale as you slowly roll up to standing, stacking each vertebra one at a time.
- Return to Mountain Pose with a lifted chest and relaxed shoulders.
Tips for Proper Alignment:
Hinge at the Hips:
- Focus on the hinge at the hips rather than rounding the lower back.
Knees Slightly Bent:
- Keep a slight bend in the knees if your hamstrings are tight to avoid straining.
Weight Distribution:
- Distribute weight evenly across the feet to maintain balance and stability.
Avoid Straining:
- Avoid locking your knees or forcing your hands to the floor. Focus on a gentle stretch and proper form.
Benefits of Forward Fold (Uttanasana):
Stretches the Back Body:
- Provides a deep stretch to the hamstrings, calves, and lower back.
- Lengthens the spine, helping to release compression and tension.
Calms the Nervous System:
- Forward bends are naturally calming, reducing stress and anxiety.
- Encourages relaxation and helps quiet the mind.
Improves Flexibility:
- Regular practice increases flexibility in the hamstrings, calves, and hips.
- Improves overall range of motion in the body.
Relieves Tension in the Spine:
- Eases tightness in the lower back and promotes spinal alignment.
- Helps counteract the effects of sitting for long periods.
Stimulates Blood Circulation:
- Increases blood flow to the brain, which can boost mental clarity and energy levels.
Strengthens the Legs:
- Engages and strengthens the thighs, knees, and calves as you hold the pose.
Improves Digestion:
- Compresses the abdomen, stimulating the digestive organs and improving digestion.
Relieves Headaches and Fatigue:
- Encourages deep breathing and relaxation, which can help alleviate headaches and reduce feelings of tiredness.
Cat-Cow Stretch
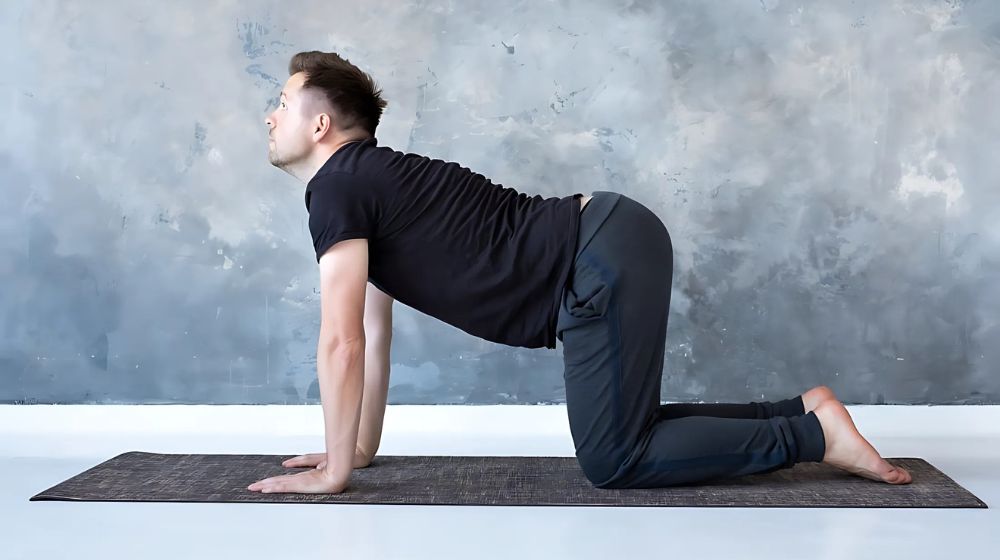
The Cat-Cow Stretch is a gentle, flowing yoga movement that stretches and mobilizes the spine while calming the mind. It combines two complementary poses—Cat Pose (Marjaryasana) and Cow Pose (Bitilasana)—to create a rhythmic flow that promotes flexibility, balance, and relaxation.
This dynamic stretch is commonly used as a warm-up exercise in yoga practices, helping to release tension in the back, neck, and shoulders, while also improving breath awareness and spinal alignment. Whether performed in isolation or as part of a larger sequence, the Cat-Cow Stretch enhances flexibility, supports spinal health, and prepares the body for more challenging poses.
How to Do the Cat-Cow Stretch
Starting Position:
- Begin on your hands and knees in a tabletop position.
- Ensure your wrists are directly under your shoulders and your knees are under your hips.
- Keep your spine neutral and your head aligned with your spine.
Cat Pose (Marjaryasana):
Inhale and start to arch your back.
- Gently lift your head, chest, and tailbone toward the ceiling.
- Allow your belly to drop toward the floor, creating a slight backbend.
Exhale and round your back.
- Tuck your chin to your chest and draw your belly button toward your spine.
- Press the floor away with your hands and round your upper back toward the ceiling.
Repeat the Flow:
- Move slowly between Cat and Cow poses with your breath, creating a gentle, flowing motion.
- Inhale into Cow, and exhale into Cat.
Cow Pose (Bitilasana):
Inhale and gently lift your chest, head, and tailbone.
- Arch your back, letting the belly sink toward the floor.
- Lift the chin and gaze upwards.
Exhale and round your spine into Cat.
- Tuck your chin to your chest, engage your core, and press firmly through your hands.
Continue Flowing:
- Flow slowly back and forth between Cat and Cow, synchronizing your breath with each movement.
Key Points:
Breath: Inhale into Cow Pose, exhale into Cat Pose.
Movement: Flow smoothly, focusing on spinal mobility and breath awareness.
Alignment: Keep your wrists under your shoulders and knees under your hips for stability.
Control: Move with intention, avoiding abrupt movements.
Benefits of the Cat-Cow Stretch
Improves Spinal Mobility:
- Gently stretches and mobilizes the spine, enhancing flexibility and reducing stiffness in the back.
- Supports healthy spinal alignment and alleviates tension in the lower back.
Strengthens Core Muscles:
- Engages and strengthens the core muscles, including the abdominals and lower back.
- Helps build stability and balance in the torso.
Calms the Nervous System:
- Soothing and repetitive motion helps reduce stress and promotes relaxation.
- Enhances breath awareness, which can lead to a more mindful state of mind.
Increases Flexibility in the Shoulders and Hips:
- Stretches and opens the shoulders, neck, and hips, promoting greater range of motion.
- Reduces tightness in these areas, improving mobility.
Improves Posture:
- Encourages proper alignment of the spine, shoulders, and pelvis, which can benefit overall posture.
- Reduces the strain on the neck and back from sitting for long periods.
Enhances Circulation:
- Stimulates blood flow to the spinal cord and surrounding muscles, boosting circulation and energy.
Relieves Tension and Stress:
- Helps release physical and mental tension by moving through controlled, mindful movements.
- Soothing, repetitive movements ease discomfort and promote relaxation.
Supports Rehabilitation and Warm-Up:
- Aids in warming up the body before more intensive physical activity.
- Assists in rehabilitation from injuries by improving range of motion and flexibility.
Low Lunge
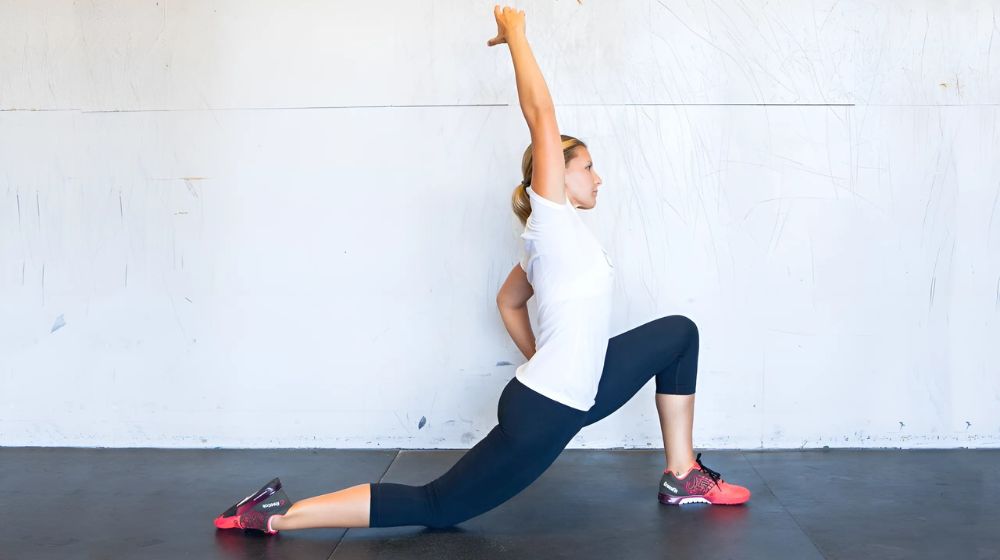
Low Lunge, or Anjaneyasana in Sanskrit, is a grounding and strengthening yoga pose that stretches the hips, thighs, and shoulders while building stability and balance. The name comes from “Anjane” meaning “relating to the mother” or “origin,” as it is named after the mother of Hanuman, a revered figure in Hindu mythology.
This pose is commonly used to open the hips, lengthen the spine, and cultivate focus and strength. Whether performed as a standalone posture or integrated into a sequence, Low Lunge promotes flexibility, alignment, and mindfulness.
How to Do Low Lunge (Anjaneyasana)
Step-by-Step Instructions:
1. Start in Downward-Facing Dog or a standing position.
- From Downward-Facing Dog: Shift your weight forward into a high plank position, then step your right foot forward between your hands.
- From standing: Step your right foot forward into a lunge position.
2. Lower Your Left Knee to the Ground:
- Lower your left knee to the mat and ensure your left toes are pointing downward.
- Keep your back foot tucked, ensuring the top of your left foot is pressing into the mat.
3. Engage Your Core and Lift Your Torso:
- Press firmly through your right foot to create stability.
- Engage your core and lift your torso, extending your arms overhead or placing them on your hips.
4. Align Your Hips and Shoulders:
- Keep your hips square, and avoid leaning forward or back.
- Draw your shoulders away from your ears, keeping a long and lifted spine.
5. Hold and Breathe:
- Hold the pose for 3–5 deep breaths, focusing on grounding through the back leg and lengthening through the spine.
- Keep your breath steady and mindful.
6. To Exit the Pose:
- Step your right foot back to meet your left foot or transition into another pose like Warrior I or II.
- Repeat on the other side.
Key Points for Alignment:
- Ensure your front knee is directly above your ankle to prevent strain.
- Keep a slight tuck in your pelvis to protect the lower back.
- Press down firmly into the back leg and keep the front foot grounded.
- Use the breath to deepen the stretch and maintain focus.
Benefits of Low Lunge (Anjaneyasana)
Stretches and Opens the Hips:
- Deeply stretches the hip flexors, quadriceps, and thighs.
- Helps release tension in the hips, which can improve flexibility and mobility.
Strengthens the Legs and Core:
- Engages and strengthens the legs, particularly the quadriceps, hamstrings, and calves.
- Builds stability in the core and lower body for better balance and posture.
Improves Spinal Flexibility and Length:
- Lengthens the spine, promoting a sense of openness and improved flexibility in the back.
- Helps relieve tension in the lower back by promoting a gentle backbend.
Encourages Mindful Breathing and Calmness:
- Promotes deep breathing, enhancing relaxation and reducing stress.
- Helps focus the mind by integrating breath with movement, fostering a sense of calm.
Enhances Balance and Stability:
- Improves balance and coordination as you engage both legs and activate the core.
- Stabilizes the pelvis and strengthens the body’s foundation.
Supports Better Posture:
- Encourages proper alignment of the pelvis and spine, which aids in maintaining healthy posture.
- Reduces strain on the lower back and helps alleviate discomfort from prolonged sitting or standing.
Promotes Circulation and Energy Flow:
- Stimulates blood flow to the hips, legs, and pelvis, boosting circulation and energy levels.
- Supports detoxification by improving lymphatic flow and circulation in the lower body.
Calms the Nervous System:
- Its grounding nature can help reduce anxiety and promote relaxation, offering mental clarity and focus.
Butterfly Pose
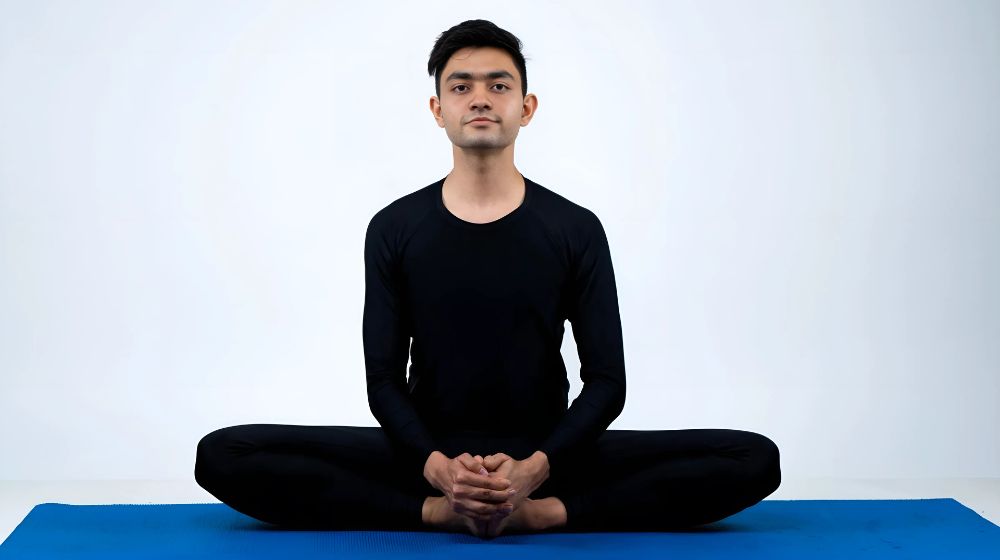
Butterfly Pose, or Baddha Konasana, is a gentle and accessible yoga posture that focuses on stretching and opening the hips and inner thighs. The name comes from the shape and motion that mimics the wings of a butterfly, as you move your legs up and down. This pose is often used to release tension in the lower body while promoting flexibility, stability, and mindfulness.
Butterfly Pose is ideal for anyone looking to improve hip flexibility, enhance circulation, and reduce stress. It can be a restorative pose that also promotes a sense of calm and grounding. Whether incorporated into a yoga sequence or practiced on its own, Butterfly Pose offers a variety of physical and emotional benefits.
How to Do Butterfly Pose (Baddha Konasana)
Step-by-Step Instructions:
- Start in a seated position with your legs extended straight in front of you.
- Bend your knees and bring the soles of your feet together, allowing your knees to fall open outward.
- Hold your feet with your hands, either placing your palms over your feet or interlacing your fingers around them.
- Gently press your knees toward the floor, keeping your feet pressed together.
- Sit tall, keeping a straight spine and avoiding rounding your back.
- Flap your legs up and down, mimicking the motion of a butterfly’s wings.
- Hold the position, maintaining a steady breath for several breaths.
- To release, slowly extend your legs forward and rest.
Key Points for Butterfly Pose:
- Keep your spine elongated and avoid collapsing forward.
- Focus on deep, steady breaths to relax the inner thighs and hips.
- Hold for 1–3 minutes or as long as comfortable.
Benefits of Butterfly Pose (Baddha Konasana)
– Stretches and opens the inner thighs, hips, and groin.
– Improves flexibility in the hips, making it easier to move and stretch.
– Strengthens the pelvic area and promotes healthy circulation in the lower body.
– Releases tension in the hips and lower back, reducing discomfort.
– Enhances posture by encouraging a long, straight spine.
– Helps improve mental calmness and reduces stress through rhythmic movement.
– Stimulates digestion and improves blood flow to the reproductive organs.
– Can assist in preparing the body for deeper seated postures in yoga practice.
Cobra Pose
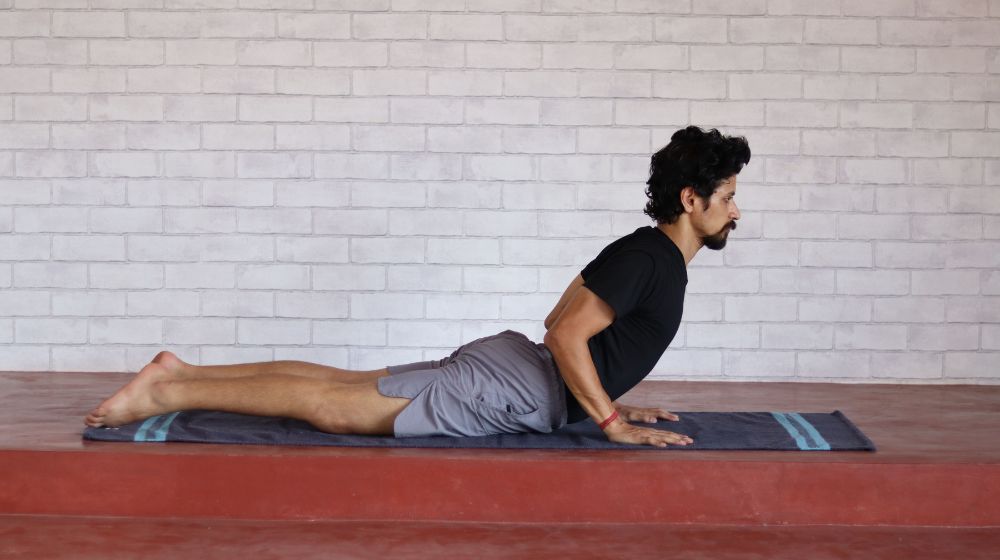
Cobra Pose, or Bhujangasana, is a gentle backbend that helps stretch and strengthen the spine, back muscles, and chest. The name Bhujangasana translates to “serpent pose,” symbolizing the shape and flow of a cobra rising.
This pose is widely practiced in yoga to improve flexibility, build strength in the back, and relieve tension in the lower back. It also opens the chest and stimulates the lungs, making it beneficial for both physical and respiratory health.
How to Do Cobra Pose
Lie face down on your mat with your legs extended straight behind you and feet hip-width apart.
Place your palms under your shoulders, keeping elbows close to your body and slightly bent.
Press into your hands and lift your chest off the ground, using your back muscles to lift.
Engage your back muscles to lift higher while keeping your shoulders relaxed and away from your ears.
Keep your elbows close to your body, ensuring they don’t flare out to the sides.
Lift through your heart and lengthen through your spine as you gently backbend.
Hold the pose for 15-30 seconds, maintaining steady and deep breathing.
To release, slowly lower your chest back to the mat.
Cobra Pose strengthens the back while promoting flexibility and opens up the chest, providing a rejuvenating stretch for both the physical and emotional body
Benefits of Cobra Pose (Bhujangasana)
- Strengthens the spine, back muscles, and shoulders.
- Opens the chest and stimulates the lungs, improving respiration.
- Stretches the abdominal muscles and increases flexibility in the lower back.
- Relieves tension in the lower back, promoting better posture.
- Improves circulation to the spine, enhancing spinal health.
- Boosts confidence and focus through its strengthening and lengthening effects.
- Reduces stress and enhances relaxation by promoting deep breathing.
- Encourages better alignment and flexibility in the body, supporting overall physical health.
Seated Forward Bend
Seated Forward Bend, or Paschimottanasana in Sanskrit, is a seated yoga posture that deeply stretches the hamstrings, spine, and entire back body. The name Paschimottanasana translates to “intense stretch of the west,” referring to the stretch of the posterior body. This pose is not only physically rejuvenating but also calming for the mind.
Seated Forward Bend is often practiced to improve flexibility in the hamstrings, lower back, and hips while promoting relaxation and mental clarity. It helps release tension in the spine and stimulates the digestive and nervous systems.
How to Do Seated Forward Bend (Paschimottanasana)
Step-by-Step Instructions:
- Sit on the floor with your legs extended straight in front of you.
- Engage your legs, ensuring your heels are flexed and your toes are pointed upward.
- Lengthen your spine, sitting tall with your shoulders relaxed away from your ears.
- Inhale deeply, and on the exhale, hinge forward at your hips to reach toward your feet or ankles.
- Reach your hands toward your feet, clasping them or resting them on the floor near your legs.
- Keep your spine long, avoiding rounding your back as much as possible.
- Hold the pose for several breaths, maintaining a steady and deep breath.
- To release, slowly come back up to a seated position.
Key Points for Seated Forward Bend:
- Alignment: Keep your spine straight and avoid rounding your back.
- Breath: Focus on long, deep breaths to enhance the stretch and maintain calmness.
- Duration: Hold for 1–3 minutes or as long as comfortable.
Benefits of Seated Forward Bend
- Stretches the hamstrings, spine, and back muscles.
- Improves flexibility in the hips, legs, and lower back.
- Soothes tension in the spine, promoting better posture and alignment.
- Calms the nervous system, reducing stress and anxiety.
- Stimulates the digestive organs and improves circulation to the abdominal region.
- Enhances mental clarity and focus through deep breathing.
Pigeon Pose
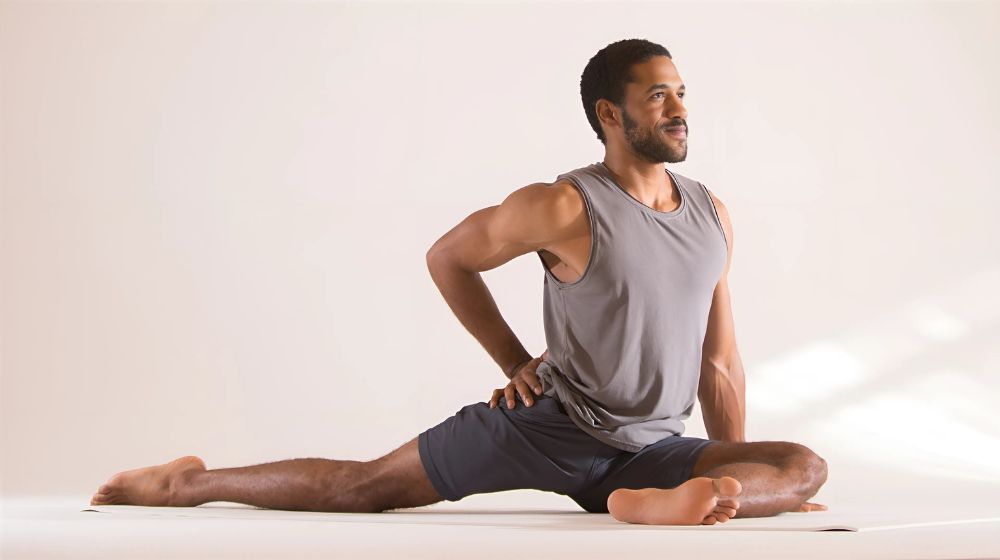
Pigeon Pose, or Eka Pada Rajakapotasana, is a deep hip-opening yoga posture that stretches the hips, thighs, and lower back. The name Eka Pada Rajakapotasana translates to “one-legged king pigeon pose,” symbolizing a regal stretch for the body.
This pose is widely used in yoga to release tension in the hips and improve flexibility. It not only provides a physical stretch but also calms the mind, making it beneficial for both the body and the nervous system. Pigeon Pose is often practiced to alleviate tightness in the hips and enhance mobility.
How to Do Pigeon Pose (Eka Pada Rajakapotasana)
Step-by-Step Instructions:
- Start in a tabletop position on your hands and knees.
- Extend your right leg forward, placing your right ankle behind your left wrist and your right knee behind your right wrist.
- Extend your left leg straight behind you, with the top of your left foot resting on the mat.
- Engage your core and press your hips toward the ground as you lengthen your spine.
- Optionally fold forward, keeping your hands on the mat or forearms resting down for a deeper stretch.
- Hold the pose for several breaths, maintaining a steady breath.
- To release, gently bring your hands down and push back to a seated position or switch sides.
Benefits of Pigeon Pose
- Deeply stretches the hips, glutes, thighs, and lower back.
- Improves flexibility and mobility in the hip joints.
- Relieves tension from prolonged sitting or physical activity.
- Strengthens and stretches the muscles surrounding the pelvis.
- Enhances posture by promoting proper alignment in the hips and spine.
- Calms the mind and reduces stress through its deep, grounding stretch.
Triangle Pose
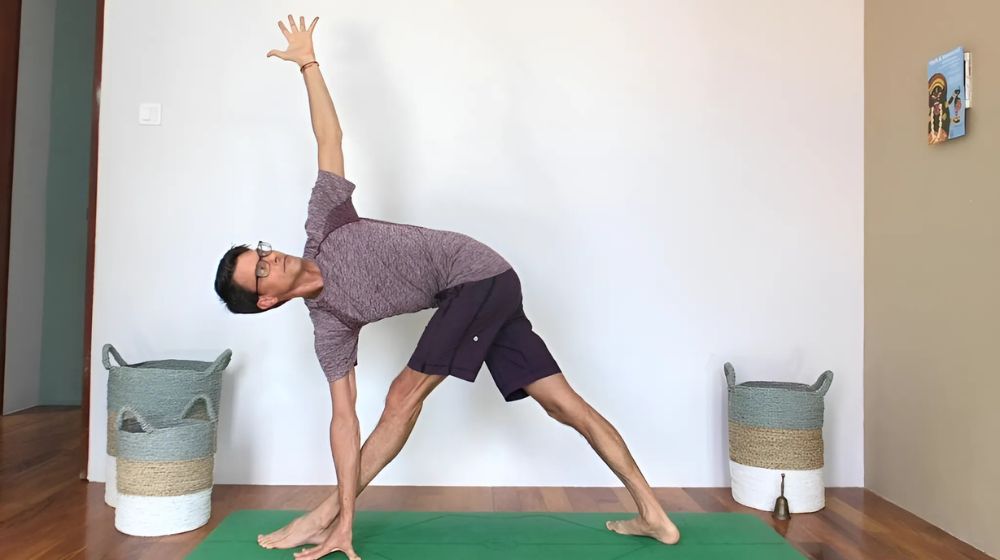
Triangle Pose, or Trikonasana, is one of yoga’s most foundational and iconic postures. This standing pose combines strength, balance, and flexibility, making it a powerful addition to any yoga practice. The name comes from the Sanskrit words “Trikona” (meaning triangle) and “Asana” (meaning posture).
In this pose, the body forms a triangle shape, and its symmetrical alignment provides a deep stretch while simultaneously improving stability. It targets the legs, hips, hamstrings, spine, chest, and shoulders, offering a holistic approach to flexibility and strength. Beyond its physical benefits, Triangle Pose also promotes mindfulness and grounding, as it encourages focus on breath and alignment.
How to Do Triangle Pose (Trikonasana)
Step-by-Step Instructions:
- Stand in Mountain Pose with your feet about 3 to 4 feet apart.
- Turn your right foot out 90 degrees and your left foot slightly inward.
- Raise your arms out to the sides at shoulder height, parallel to the floor.
- Hinge at your hips and extend your right hand toward your right foot while keeping your left arm reaching toward the ceiling.
- Place your right hand on your shin, ankle, or the floor, depending on your flexibility, avoiding placing it on the knee.
- Turn your gaze upward toward your left hand or look toward the ground for balance.
- Engage your core and lengthen through the spine, maintaining a straight alignment.
- Hold the pose for several breaths, focusing on steady, deep breathing.
- To release, return to standing by lifting your torso and arms back to shoulder height. Switch sides and repeat.
Key Points for Triangle Pose:
- Alignment: Ensure your shoulders are open and your body remains aligned throughout.
- Breath: Focus on deep, even breathing to maintain the stretch and stability.
- Duration: Hold for 15-30 seconds on each side.
Benefits of Triangle Pose
- Stretches the hips, thighs, hamstrings, and spine.
- Improves flexibility in the chest, shoulders, and ankles.
- Strengthens the legs, arms, and core muscles.
- Enhances balance and stability.
- Reduces tension in the lower back and promotes better posture.
- Improves digestion and stimulates internal organs.
Reclining Twist
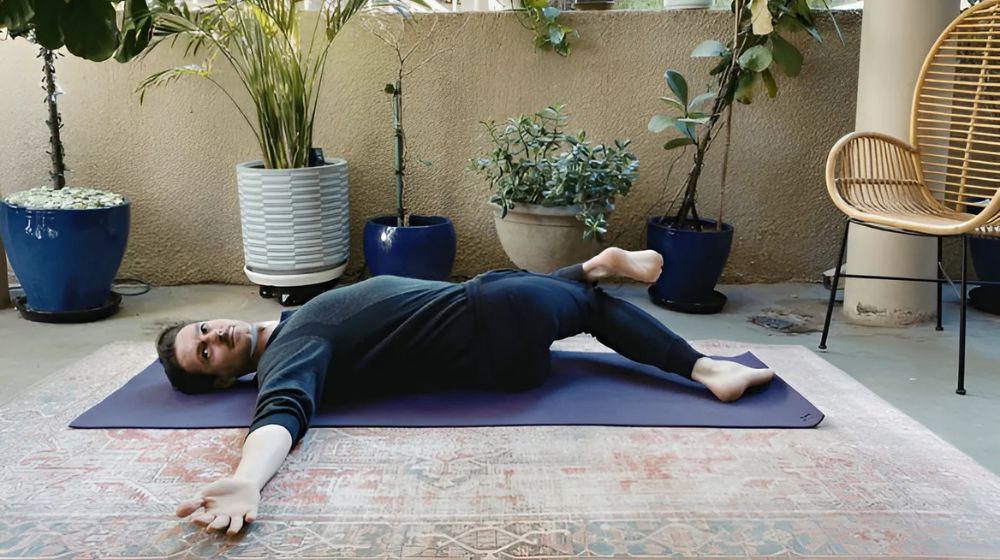
Reclining Twist, or Supta Matsyendrasana, is a gentle and restorative yoga pose that stretches and releases tension from the spine, hips, and lower back. The name Supta Matsyendrasana comes from Sanskrit, where “Supta” means reclining, “Matsya” refers to the fish pose, and “Indra” refers to a sage.
This pose helps to improve flexibility in the spine, reduce stress, and promote relaxation. It is often used as a restorative practice to release tension, improve spinal alignment, and calm the nervous system. Reclining Twist also supports digestion and enhances overall body mobility.
Step-by-Step Instructions:
- Lie down on your back with your legs extended straight and arms resting by your sides.
- Bend your right knee and bring it toward your chest.
- Cross your right knee over your left leg, placing your right foot outside your left thigh.
- Extend your right arm out to the side, palm facing up, and keep your left arm resting on your left thigh or knee for support.
- Gently press your right knee toward the floor while keeping your shoulders and upper back grounded.
- Turn your head to look over your right shoulder or toward your left arm for a deeper twist.
- Hold the pose for several breaths, allowing your body to soften into the stretch.
- To release, bring your right leg back to center and repeat on the other side.
Key Points for Reclining Twist:
- Alignment: Ensure that your shoulders stay grounded and hips are aligned throughout the twist.
- Breath: Focus on deep, steady breathing to deepen the twist and release tension.
- Duration: Hold for 1–2 minutes on each side.
Benefits of Reclining Twist
- Stretches the spine, hips, and lower back, relieving tension.
- Improves spinal mobility and alignment.
- Calms the nervous system, reducing stress and anxiety.
- Encourages deep relaxation and helps improve digestion.
- Supports better posture and body awareness.
Tips for Practicing Yoga for Flexibility
- Consistency is Key: Regular practice is essential for improving flexibility. Aim to practice at least 2-3 times a week to see gradual progress.
- Start Slowly: Begin with gentle stretches and gradually move into more advanced postures to avoid injury.
- Use Props: Utilize yoga props such as straps, blocks, or cushions to assist in achieving deeper stretches safely.
- Focus on Breath: Breathing deeply into stretches helps release tension and allows for a more effective practice.
- Warm Up First: Always include a warm-up session to prepare your body for deeper stretching and avoid muscle strain.
- Listen to Your Body: Avoid pushing beyond your limits, as listening to your body helps prevent injury.
- Hold Poses Longer: Holding yoga poses for extended periods helps to deepen flexibility and increase muscle elasticity.
- Combine Strength and Flexibility: Incorporate both strength-building exercises and flexibility-focused poses for balanced results.
- Stay Relaxed: Flexibility improves when your body is relaxed and tension-free. Avoid straining or forcing poses.
- Progress Gradually: Progress at your own pace, focusing on gradual improvements in flexibility over time.
Conclusion
In conclusion, yoga for flexibility is a powerful practice that provides a wide range of benefits for both the body and mind. By incorporating various stretches, poses, and mindful movements, yoga helps to increase the body’s range of motion, reduce muscle tension, and improve overall mobility. Regular practice can enhance flexibility not only in the muscles but also in the joints, promoting better posture and reducing the risk of injury.
Yoga’s focus on breathing and mindfulness further deepens the practice, allowing for a greater mind-body connection. As flexibility improves, individuals often experience a sense of relaxation, stress relief, and improved mental clarity. Whether you’re a beginner or more advanced, yoga can be tailored to meet your needs, making it an accessible and effective way to improve flexibility over time. Ultimately, yoga for flexibility fosters not only physical strength and flexibility but also emotional and mental resilience, creating a balanced approach to overall well-being.
FAQs about yoga for flexibility
What is Triangle Pose in yoga?
Triangle Pose, or Trikonasana, is a standing yoga pose that combines strength, balance, and flexibility. It involves stretching the sides of the torso, hips, hamstrings, and shoulders while building stability in the legs.
What are the benefits of Triangle Pose?
Triangle Pose improves flexibility in the legs and hips, strengthens the core and legs, enhances spinal alignment, and opens the chest. It also helps improve balance and posture.
Can beginners practice Triangle Pose?
Yes, Triangle Pose is beginner-friendly. Props like yoga blocks can be used to support the lower hand if flexibility is limited.
What muscles are stretched in Triangle Pose?
The pose stretches the hamstrings, calves, hips, obliques, and shoulders.
Is Triangle Pose safe for everyone?
While generally safe, those with neck, back, or knee injuries should consult with a yoga instructor or health professional before practicing. Modifications can help make the pose accessible.
How can I use a yoga block in Triangle Pose?
Place a yoga block on the ground under your lower hand to provide support if your hand doesn’t comfortably reach the floor.
How long should I hold Triangle Pose?
Hold the pose for 5-10 breaths on each side, depending on your comfort and experience level.
What should I focus on while practicing Triangle Pose?
Focus on proper alignment, such as keeping your chest open, maintaining a long spine, and avoiding collapsing into your lower side.
Can Triangle Pose help with back pain?
Yes, it can help relieve mild back pain by stretching and lengthening the spine, but it should be done with proper alignment to avoid strain.
What are common mistakes in Triangle Pose?
Collapsing the chest downward.
Rounding the spine instead of elongating it.
Locking the knee of the front leg.
Overreaching with the bottom hand.
Can pregnant women practice Triangle Pose?
Yes, with modifications. Using a block or chair for support and avoiding deep twists can make it safer during pregnancy.
How does Triangle Pose improve balance?
By grounding the feet and engaging the core, Triangle Pose improves stability and proprioception (awareness of body position).
Does Triangle Pose have mental benefits?
Yes, the pose promotes mindfulness, grounding, and focus as you align your body and maintain steady breathing.
Can Triangle Pose help with digestion?
Yes, the gentle twisting action can stimulate digestion and improve circulation in the abdominal organs.
How long does it take to improve flexibility with yoga?
It varies by individual, but regular practice can show improvements within a few weeks.
Can beginners do these poses?
Yes, these poses are beginner-friendly, and modifications can be used as needed.
Is yoga the best way to improve flexibility?
Yoga is one of the most effective and holistic ways to improve flexibility while also enhancing strength and relaxation.
How often should I practice yoga for flexibility?
Aim for at least 3-4 times a week to see consistent progress.
Are there any risks to practicing yoga for flexibility?
Practicing yoga safely involves listening to your body, using proper alignment, and avoiding overstretching. Always consult a professional if you’re unsure.
By healthylyfe
